| 350Z Installation Instructions |
|
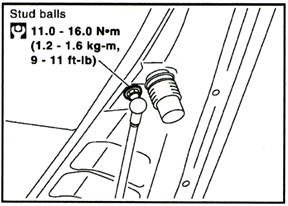
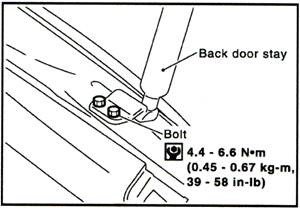
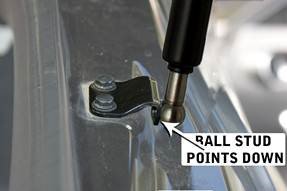
The OEM ball ends are impossible to remove from the ball studs so we have included full replacement hardware. Our gas springs feature high strength end fittings with locking safety clips which provide easy installation and removal. Notes and Tips: This installation guide makes the assumption that you are familiar with the tools and equipment necessary to install this product and are also familiar with automotive systems, as well as basic maintenance and repair procedures. Remember you are performing maintenance to you vehicle at your own risk and caution needs to me taken. The Hatch is over 100lbs and will drop when you start to remove the supports. Removal 1. Seek help in holding the door open if you cannot find a suitable support. 2. Using a 12mm wrench, remove the ball studs located on the rear hatch door. 3. Using a 10mm wrench or socket, remove the bracket/stud assemblies from the rear fenders. Installation 1. Install the new stuff balls and washers on rear hatch and apply proper torque (Figure 1). 2. Install the new bracket/stud assemblies onto fenders and apply proper torque (Figure 2). (NOTE see Figure 3 to make sure the bracket is mounted in the correct direction. Installing upside down will cause the lid not to close properly). 3. Repeat for opposite side of vehicle. 4. Give a little tug onto each support to make sure that it securely attached to the ball studs. |
|
Figure 1 |
|
Figure 2 |
|
Figure 3 |


