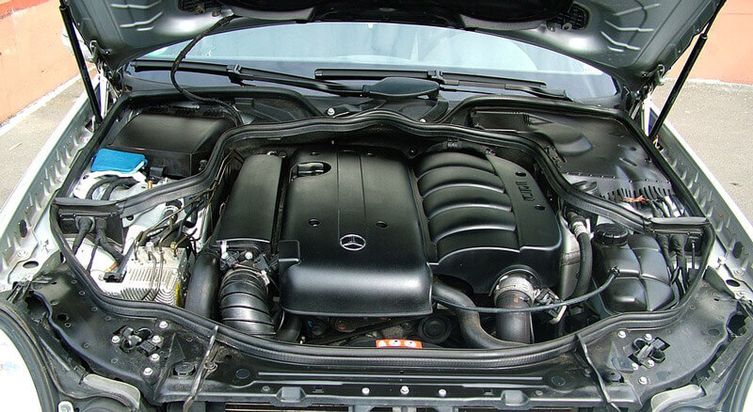
Opening your vehicle’s hood, trunk, tailgate, or hatch is simply a matter of applying a little lifting force using your fingers. But how can you lift such a heavy piece of metal with much ease? The answer lies in those piston lift supports you see on either side of your liftgate. They’re also known as lift struts or gas struts, and they make opening the hood or liftgate a whole lot easier.
Without lift supports on your car’s trunk or hood, it would be tedious to lift it when loading or unloading your cargo. Also, if you let the hood or trunk go when open, it would crash down on your car’s body, probably causing damage. Ensuring that your lift supports are working smoothly every time is vital to ensure easy and convenient lifting and closing of your liftgates.
Here’s a step-by-step guide on claw-style gas strut installation, which will help you do it on your own in the safety of your home.
Installation Basics You Should Know
- Lift supports should be replaced at the same time to ensure reliable performance and prevent any twisting due to uneven loading.
- Lift supports can be easily installed in minutes and don’t require special tools.
- All connecting points and strut hinges should be properly inspected for any possible wear and tear. These should be replaced or repaired before the gas strut installation.
- Before you go ahead and remove your old gas struts, check the support fittings to be sure that the components that must be re-used are in good condition.
Get the Right Replacement Lift Supports
Strut installation can be a simple process, regardless of your level of experience. But, you need the right type of replacement struts for your car make and model. Before you order replacements, check the existing struts for any important details or refer to your car owner’s manual to see details on replacement recommendations.
Here are some details you should keep in mind:
- The overall length of the gas strut from center-to-center (extended)
- The pressure rating of the gas struts
- Type of gas strut end fittings
- Year, make, and model of your vehicle
Step-by-Step Gas Strut Installation Process
Tools Needed
- A flathead screwdriver
- New lift supports
- Prop for supporting the liftgate
- Safety glasses and gloves
Support the Hood, Trunk, or Tailgate
For safety reasons, it’s recommended that you get someone to hold the hood, rear window, hatch, or trunk open as you replace the lift supports. If you’re on your own, you can use a sturdy prop stick to secure the car’s hood, trunk, or tailgate. This can be a length of wood or pipe. Make sure it’s properly secured to avoid injury.
Inspect The End Connections
Before you remove the old lift supports, inspect the end connections of the replacement struts, and do a comparison with the ones of your vehicle to make sure they’re the same. Also, check that the overall length is correct when the struts are fully extended. This is critical to ensure proper gas strut installation.
Remove the Lift Supports
Don’t remove the two gas struts at the same time. Start with one and replace it, and then remove the other one and replace it. To remove the claw-style lift supports, use a flathead screwdriver to remove the strut’s retaining clips. Slowly lift up the clips and pull the strut away from the vehicle, and it should release. Remove the clips cautiously to ensure safety.
- For lift supports with removable ball connectors, remove the old strut by prying the retaining ring, security lock, ring, or cap lock.
- For lift supports with eyelet connectors, unscrew the mounting bolt or remove the retaining clip.
- For lift supports with eyelet connectors with retaining clip, simply pry the retaining clip off.
- For lift supports with keyhole slot connectors, slide the lift support so the keyhole can be easily lifted off the mounting stud. With these options, gas strut installation will be simpler.
Mount the Replacement

With your lift support on one end removed, you can now install the replacement strut to your car. To do this, start with the shaft end first (the skinny end). Gently use your fingers to apply some pressure as your place the strut’s ball socket over the ball joint. The strut should pop into place. Once both ends are on the ball studs, you’ll want to give the strut a gentle tug to be sure that it’s securely attached to your vehicle.
Repeat the process of removing and installing the lift support for the other end. Gas strut installation is a pretty straight-forward process that anyone can do with the help of these simple instructions.
Shop the Best Lift Supports
The best lift supports are defined by their high quality, design, and durability standards. They come with superior rod finish that increases seal durability, high-strength piston seal, high-pressure gas-filled for smooth action, and steel body pressure cylinder for maximum durability. At Lift Support Depot, we bring you top-brand lift supports you can count on for your replacement needs.
Shop at Lift Support Depot today. We have over 6000 products and over 15 years of data that makes it easy to match you with the exact product that you need. Contact us to enjoy one-on-one personal service and a limited 5 year warranty with every purchase.
Part Note:
Due to the sharp pitch of some Lift Supports this claw type end is used. It is designed to swivel with the grove. Please review the pictures below. The image below pertains to the following part numbers 4032, 4256, 4257, 6303, 6303Kit3, 6406,6607, PM1008, PM3000, PM3025 and SG314021